


- info@prototypeshlh.com
- +86-133-9285-9203
- Room 2003, 20th Floor, Xingji Building, Shangde Road, Shajing Street, Bao'an District, Shenzhen
SERVICES

CNC Machining Service
Tight tolerances and finishing capabilities, as fast as 2 days.

Vacuum Casting Service
Production quality parts without the tooling investment.

Sheet Metal Fabrication
Experience the versatility 6 cost efficiency withflexible application options.

Die Casting Service
Create high quality custom mechanicals withprecision and accuracy.

Injection Molding Service
Production-grade steel tooling, as fast as weeks.
Carbon Fiber Manufacturing
Composite materials, such as carbon fiber reinforced plastics are highly versatile and efficient materials.
Popular Services

Injection Molding Service
A faster, easier way to order high-quality injection molded parts that accelerates iteration, testing, and scaled production. Upload your designs for DFM feedback and pricing in 24 hours.

3D Printing Service
Our 3D printing solutions cater to personalised needs with a diverse range of materials and colour options, including SLA, SLS, FDM, Projet, DMLS, and MJF printing services.

Surface Finishing
The easiest way to source your custom parts, with 15+ surface finishing options.

Design Guide
In-depth design guides full of best practices for all of HLH's manufacturing processes.

Case Studies
Success stories from innovativecompanies using HLH.

Blog
lndustry trends, company news andproduct updates.
Featured Posts

3D Printing vs. CNC Machining: Which is Better for Prototyping?
View more →

The Advantages of Projection 3D Printing for Mass Production
View more →

How to Choose Between Aluminum Alloy Casting and CNC Machining
View more →

What is Vacuum Injection Molding? What Type Suitable for Production?
View more →
About Us
Learn about our company, leadership, and mission totransform manufacturing.
Privacy Policy
Applies to all personal information collected through and/or processed in connection.

Contact Us
Our team is on stand by, waiting to assist you.

Videos
A large collection of educational videos and tutorials.

Aerospace & UAV
HLH is your 3D manufacturing partner from prototype to large scale production.

Consumer Products
New Product Introduction Solutions for Consumer Products.

Automotive
New Product Introduction Solutions for Automotive.

Industrial Machinery
The main purpose of industrial prototyping is to take the product from drawings into the real world.

Robotics & Automation
Need some assistance bringing your robotic device or parts from the sketch-board to reality?

Medical Devices
The medical industry needs high quality, dependable and safe parts and products.

Communications
We understand the demands and ever changing landscape of the communications industry.

Product Development
Industrial design and engineering consultancies are some of the most innovate and creative enterprises on the planet.

In the world of product development, there exists a critical gap between a single 3D-printed prototype and full-scale injection molding. Bridging this gap requires a manufacturing process that can deliver small batches of high-quality parts—with production-grade appearance and mechanical properties—without the astronomical cost of hard tooling. Vacuum Casting, also known as Urethane Casting or Polyurethane Casting, is precisely that bridge .
Vacuum casting is a manufacturing process similar to injection molding, where liquid polyurethane resin is cast in a cavity between two silicone mold halves under vacuum conditions. The vacuum environment removes trapped air, ensuring the mold fills completely, and the resulting parts are free from bubbles and defects. This technique produces highly accurate reproductions of the original master model, with surface finishes and mechanical properties that closely mimic injection-molded components.
This comprehensive guide will explore every aspect of vacuum casting—from its fundamental principles and step-by-step process to material selection, design guidelines, applications across industries, and how it compares to alternative manufacturing methods.
Vacuum casting is a soft tooling process that uses flexible silicone molds to produce plastic and elastomeric parts . The process derives its name from two defining characteristics:
The process begins with a master pattern (also called a master model)—a precise, three-dimensional positive of the desired part. This master is used to create a negative silicone mold, which is then split open, the master removed, and the cavity filled with liquid polyurethane resin under vacuum. After curing in an oven, the result is a replica of the original master.
In different regions and industries, this process goes by several names:
| Term | Usage Context |
|---|---|
| Vacuum Casting | Common in Europe and general technical literature |
| Urethane Casting | Prevalent in the United States |
| Polyurethane Casting | Technical term emphasizing the material system |
| Silicone Mold Casting | Descriptive term highlighting the mold material |
| RTV Casting | Refers to Room-Temperature Vulcanization silicone |
Throughout this guide, these terms are used interchangeably to describe the same fundamental process.
The vacuum casting process transforms a digital design into physical parts through a carefully controlled sequence of steps. Understanding each phase is essential for achieving optimal results.
Every vacuum casting project begins with a 3D CAD model created in software such as SolidWorks, Fusion 360, or CATIA. During this phase, designers should incorporate features optimized for the casting process:
The completed model is exported as an STL file for master pattern production.
The master pattern (or master model) is the physical positive from which all copies will be derived. Its quality directly determines the quality of every cast part. A good master pattern must be:
Methods for Master Pattern Production:
| Method | Advantages | Limitations | Best For |
|---|---|---|---|
| SLA 3D Printing | Ultra-smooth surface finish, high detail, fast turnaround | Limited material properties | Most prototypes, complex geometries |
| SLS 3D Printing | Strong, durable, no supports needed | Slightly rough surface finish | Functional prototypes, complex internal features |
| CNC Machining | Excellent dimensional accuracy, wide material choice | Higher cost, slower, design constraints | Precision components, production-intent validation |
For vacuum casting, SLA 3D printing is often preferred because it produces parts with the highest surface smoothness—ideal for creating molds that yield flawless castings. However, post-processing such as sanding and polishing may be required to remove support marks and achieve absolute perfection.
With the master pattern complete, the next step is creating the negative silicone mold:
Mold Life Considerations:
| Silicone Type | Expected Mold Life | Characteristics |
|---|---|---|
| RTV Silicone | 20–25 parts | Standard room-temperature vulcanization |
| HTV Silicone | 300–500 parts | High-temperature vulcanization, enhanced durability |
This is the heart of the process, where parts are actually produced:
The vacuum environment is critical—it prevents bubble formation and ensures the resin reaches every corner of the mold, much like capillary action in a plant stem.
After the mold is filled, it is transferred to an oven for curing:
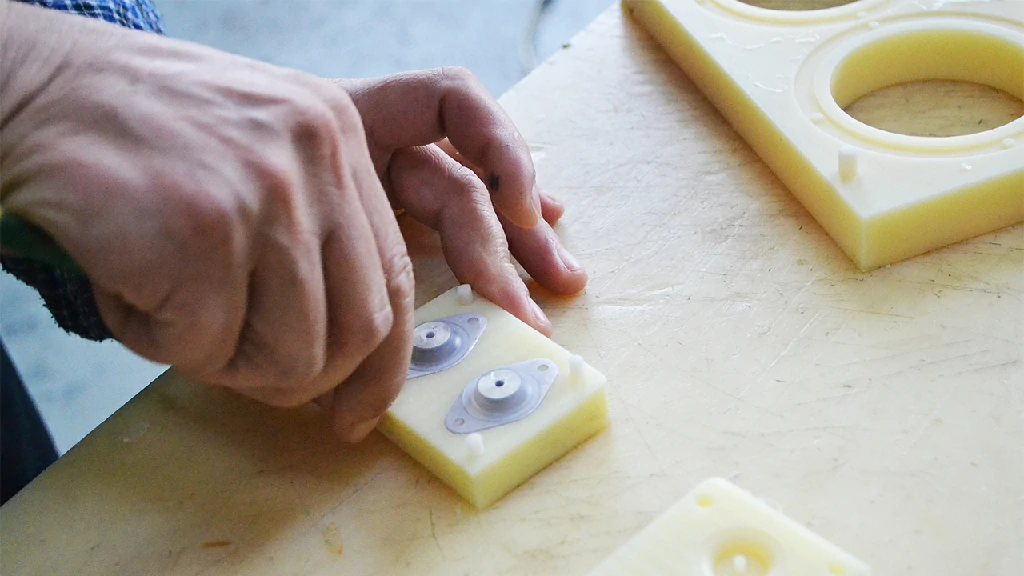
Once cured, the parts are removed from the mold :
The silicone mold can typically be reused for 10–25 additional parts before dimensional accuracy begins to degrade, depending on part complexity and material used.
One of the greatest strengths of vacuum casting is the wide range of available polyurethane resins that can simulate various production plastics.
| Material Type | Trade Names/Examples | Key Characteristics | Hardness | Applications |
|---|---|---|---|---|
| ABS-like | UP4280, PX100, PX250 | Rigid, impact-resistant, heat-resistant | Shore D78-82 | General-purpose housings, functional prototypes |
| Polypropylene-like | UP5690 | High impact strength, chemical resistance | Shore D75-86 | Living hinges, containers, automotive parts |
| Polycarbonate-like | PX510, UP6160 | Transparent, high impact strength, lightweight | Shore D82-86 | Lens housings, transparent covers, medical devices |
| Nylon-like (Glass-filled) | Various | High strength, high stiffness, reinforced with glass fibers | Shore D58-75 | Structural components, load-bearing parts |
| TPE-like (Elastomers) | UP8400, T087 | Flexible, rubber-like, high elongation | Shore A60-80 | Gaskets, seals, soft-touch handles |
| PMMA/Acrylic-like | X522HT | Transparent, UV-resistant, hard surface | Shore D87 | Clear covers, light guides, display windows |
| High-Temperature | Various | Maintains properties at elevated temperatures | Varies | Under-hood automotive, industrial equipment |
The ability to select materials with specific properties makes vacuum casting invaluable for functional testing:
Vacuum casting also offers excellent color flexibility. Pigments can be added to the resin mixture to achieve specific RAL or Pantone colors, enabling the production of visually accurate prototypes for market testing or customer presentations.
To achieve optimal results with vacuum casting, designers should follow established guidelines that account for the unique characteristics of silicone molds and polyurethane resins.
| Design Element | Recommendation | Rationale |
|---|---|---|
| Wall Thickness | 1.5–2.5 mm (minimum 1.0 mm) | Ensures complete filling and structural integrity |
| Dimensional Tolerances | ±0.3 mm (0–25 mm range) up to ±0.55 mm (125–150 mm range) | Accounts for 0.15% material shrinkage |
| Ribs | 60% of nominal wall thickness | Prevents sink marks while adding strength |
| Bosses | Wall thickness ≤60% of nominal; minimum height 1 mm | Provides attachment points without defects |
| Undercuts | Freely designable (flexible mold allows demolding) | Unlike rigid tooling, undercuts are possible |
| Embossed/Engraved Details | Minimum width 1 mm, depth/height 1 mm | Ensures legibility after casting |
| Radii | >3 mm generous radii | Improves material flow and reduces stress |
| Dimension Range (mm) | Expected Tolerance (±mm) |
|---|---|
| 0–25 | 0.3 |
| 25–50 | 0.35 |
| 50–75 | 0.4 |
| 75–100 | 0.45 |
| 100–125 | 0.5 |
| 125–150 | 0.55 |
For tightly fitting components, aim for tolerances below ±0.35 mm.
Vacuum casting serves a diverse range of industries, each leveraging its unique combination of quality, speed, and cost-effectiveness.
| Industry | Applications | Benefits Sought |
|---|---|---|
| Automotive | Dashboard panels, knobs, gauges, light lenses, inlet manifolds, door handles, vent louvers | Functional testing, design validation, interior/exterior appearance |
| Consumer Electronics | Enclosures for smartphones, laptops, wearables; controllers, user interface panels | Form/fit testing, market-ready appearance, rapid iteration |
| Medical Devices | Prostheses, orthoses, hearing aids, diagnostic equipment enclosures, custom surgical tools | Biocompatible-like materials, custom-fit devices, regulatory validation |
| Aerospace | Interior panels, air ducts, cabin fittings, non-structural components | Lightweight parts, design experimentation, material testing |
| Industrial Machinery | Critical components, spare parts, robot parts, sensor housings | Functional validation, small-batch production |
| Consumer Goods | Limited edition sunglasses, pens, phone cases, sports equipment add-ons | Market testing, small production runs, premium appearance |
| Art & Collectibles | Sculptures, figurines, scale models, props, replica artifacts | Exact reproduction of originals, small quantities |
Replicating Rare or Discontinued Items: Vacuum casting excels at reproducing existing objects without complex reverse engineering. This is invaluable for sculptures, fossils, historical artifacts, antiques, and collectibles where no CAD model exists.
Custom Medical Devices: The ability to produce small batches of patient-specific devices makes vacuum casting ideal for prosthetics, orthotics, and hearing aids.
Insert Molding: Vacuum casting can incorporate metal components directly into prototypes through insert molding, simulating final assembly conditions.
Understanding how vacuum casting compares to other processes is essential for selecting the right manufacturing approach.
| Parameter | Vacuum Casting | Injection Molding | 3D Printing | CNC Machining |
|---|---|---|---|---|
| Description | Small batches of detailed parts, near-production quality | High-volume production of plastic parts | Rapid prototyping, complex geometries | High-precision metal/plastic parts |
| Optimal Quantity | 1–100 parts | 50–1,000,000+ parts | 1–100 parts | 1–100 parts |
| Lead Time | 10–20 days | 38+ days | 3–7 days | 7–10 days |
| Tooling Cost | $200–$1,000 | $5,000–$100,000+ | $0 (no tooling) | $0–moderate (fixturing) |
| Per-Unit Cost | $10–$100 (low volume) | Very low (high volume) | Moderate | High (low volume) |
| Material Range | Polyurethanes (ABS/PP/PC/PA/TPE-like) | All thermoplastics | Wide (plastics, resins, metals) | Very wide (metals, plastics) |
| Surface Finish | Excellent (as-cast) | Excellent | Moderate (layer lines) | Excellent |
| Mechanical Properties | Near-production | Production-grade | Variable | Production-grade |
| Design Flexibility | High (undercuts possible) | Limited (requires draft) | Very high | High |
| Typical Mold Life | 20–25 parts (RTV) | 10,000–1,000,000+ cycles | N/A | N/A |
When to Choose Vacuum Casting:
When to Choose Injection Molding:
Expert Strategy: "Start with vacuum casting to test form, fit, and finish. Once your geometry, material, and tolerances are locked in, transition to injection molding for mass production."
When to Choose 3D Printing:
When to Choose Vacuum Casting:
Expert Strategy: "Use 3D printing to explore ideas and optimize geometry. Then switch to vacuum casting to create realistic samples for user testing, mechanical validation, or customer presentations."
When to Choose CNC Machining:
When to Choose Vacuum Casting:
Advantages of Vacuum Casting:
| Advantage | Description |
|---|---|
| Low upfront investment | Silicone molds cost hundreds, not thousands of dollars |
| Rapid turnaround | Complete process in 10–15 days from master to finished parts |
| Production-like quality | Parts visually and mechanically similar to injection molding |
| Design flexibility | Supports undercuts, complex geometries, variable wall thickness |
| Excellent surface finish | Smooth as-cast surfaces, minimal post-processing needed |
| Wide material selection | Multiple resin types simulating common engineering plastics |
| Zero material waste | Environmentally friendly compared to injection molding |
| Insert molding possible | Metal components can be cast in place |
Limitations of Vacuum Casting:
| Limitation | Description |
|---|---|
| Material constraints | Only polyurethane resins; cannot use production plastics directly |
| Mold life | 20–25 parts per mold (RTV); 300–500 (HTV) |
| Size limitations | Typically up to 500–900 mm maximum dimension |
| Manual process | Less automated, not suitable for very high volumes |
| Tolerance limitations | ±0.3–0.55 mm typical; less precise than CNC or injection molding |
| Post-curing required | Some materials need extended room-temperature curing |
| UV sensitivity | Some resins remain vulnerable to UV degradation |
The quality of vacuum-cast parts depends heavily on the master pattern :
Vacuum casting involves inherent material shrinkage of approximately 0.15% . Designers must account for this when specifying tolerances. For critical mating features, consider:
While vacuum casting is less automated than injection molding, experienced technicians can achieve remarkable consistency. Key factors affecting reliability :
Use this framework to determine if vacuum casting is right for your project:
| Scenario | Why Vacuum Casting Fits |
|---|---|
| You need 5–50 identical prototypes | Economical compared to 3D printing multiple copies |
| Surface finish and appearance matter | As-cast quality rivals injection molding |
| You're presenting to investors or customers | Parts look and feel like production units |
| Functional testing requires production-like materials | Resins simulate ABS, PP, PC, nylon properties |
| Design is not fully finalized | Low tooling cost allows iterations |
| You need parts quickly (10–15 days) | Faster than waiting for production tooling |
| Parts have complex geometries or undercuts | Flexible molds handle features impossible with rigid tooling |
| You're bridging to mass production | Validate design before committing to expensive molds |
| Scenario | Better Alternative |
|---|---|
| You need only 1–2 parts | 3D printing or CNC machining |
| You need thousands of parts | Injection molding |
| Parts require tight tolerances (±0.1 mm or better) | CNC machining or precision injection molding |
| Parts must be made from specific production-grade plastic | Injection molding with that exact material |
| Parts are very large (>900 mm) | Consider fabrication or large-format 3D printing |
| Design changes frequently | 3D printing for rapid iteration, then vacuum casting for final validation |
Vacuum casting occupies a unique and valuable position in the product development landscape. It bridges the gap between the design freedom of 3D printing and the production reality of injection molding, offering engineers and product developers a powerful tool for validation, testing, and small-scale production .
Key takeaways:
For product development teams seeking to de-risk their investments, accelerate time-to-market, and deliver higher-quality products, vacuum casting is not just an option—it's a strategic necessity. By understanding its capabilities, limitations, and optimal applications, engineers can leverage this versatile process to transform innovative ideas into manufacturable realities .
SERVICES